Friday, September 27, 2013

Pumpkin Crunch Cake


DSC_1464
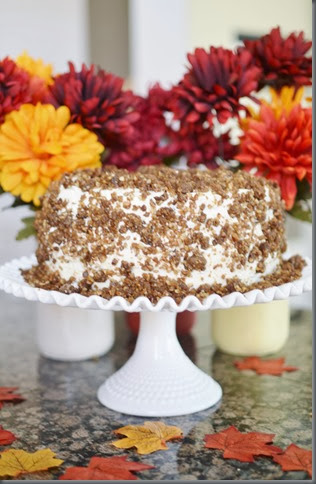
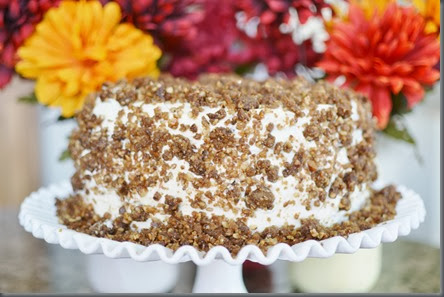
This is one of the most amazing cakes I’ve ever made. Do you see how beautiful and FALL it is?! It’s so perfect for the season.
DSC_1465
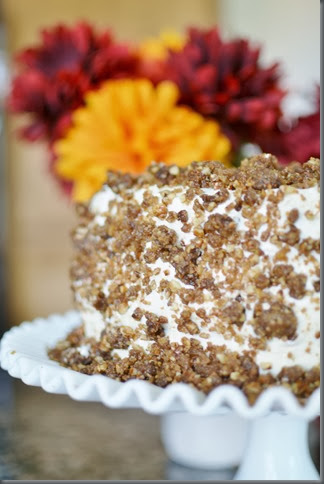
I’m not going to lie, this is NOT a low fat, low calorie dessert:) But hey, it’s my philosophy that if you’re going to eat dessert, you need to eat it right. And this is just oh so right.
DSC_1470
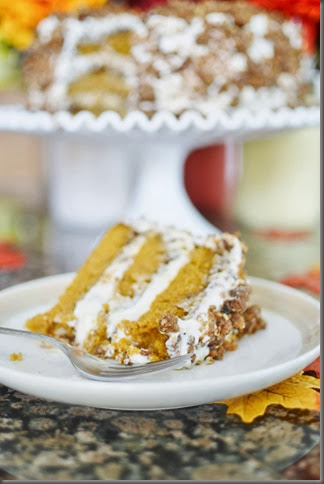
Pumpkin cake, crunchy streusel and whipped cream cheese frosting layered to perfection.
DSC_1471
So next time you’re looking for a fall dessert to make, make this one. It’s so perfect in so many ways. Oh and this also isn’t a cake you’re going to whip up in 30 minutes. It’s a little time intensive, but it’s worth it, so do it:)

Crunch Topping
3 cups pecans, finely chopped
3 cups vanilla wafers (about 75 cookies)
3 cups brown sugar
3 sticks butter

Pumpkin Cake
1¼ cup sugar
1 1/2 sticks softened butter
1 16 oz can pumpkin
2 1/4 cups flour
½ cup sour cream
1 T vanilla
1 T pumpkin pie spice
2¼ t baking powder
¾ t baking soda
½ t salt
4 Eggs

Cream Cheese Frosting
2 blocks (16 oz) cream cheese, softened
1 stick softened butter
2 cups powdered sugar
1 t vanilla
1 1/2 cups whipping cream
2 T powdered sugar


Crunch Topping
  1. Melt butter
  2. In a food processor, pulse cookies to a fine crumb. Remove from processor and put into a medium bowl.
  3. Then pulse pecans to very small pieces. Add pecans to the bowl with the cookie crumbs.
  4. Add in brown sugar and mix well.
  5. Add in melted butter and mix until completely blended.
  6. Place one very full cup of the mixture into 3 heavily greased 8 or 9 inch round cake pans, pressing into bottom and spreading it evenly into the cake pans. There will be plenty leftover which will be baked to use on the sides of the cake.
  7. Set pans aside and begin cake.
  8. Preheat oven to 350 degrees.
Pumpkin Cake
  1. In your mixer beat sugar and butter for about 3-5 minutes until light and fluffy, scrapping down the bowl frequently .
  2. Add in pumpkin and all the rest of the ingredients, except the eggs. Mix just until blended. Do not over blend.
  3. Add in the eggs, one at a time, scraping the sides after each addition.
  4. Divide batter equally into your 3 prepared cake pans on top of the nut/cookie mixture, smooth it out and make it as even as possible in the pan.
  5. Place remaining crunch mixture in a 4th cake pan or pie dish and allow to bake for the same amount of time as the cakes.
  6. Bake in a 350 degree oven for about 25-30 minutes or until a toothpick inserted in the center comes out clean. If you use 2 racks to bake on in the oven, at the halfway mark rotate the pans. Even if you have them all on the same rack, it’s best to switch them out halfway through.
  7. Allow pans to cool about 10 minutes, then turn them out onto a wire racks and allow to completely cool. DO NOT LET THE CAKES COOL IN THE PANS. This is important because the crunch mixture will stick to the pans and you’ll be scraping it out. Now don’t worry if it sticks. Just piece it back together as best you can because remember that it really doesn’t matter because you’ll be covering it all up with frosting anyway. That’s the beauty of layered cakes:)
  8. Break up the extra crunch mix to very small bits to use to decorate the cake with.
  9. While your cakes are baking prepare a cream cheese frosting.
Cream Cheese Frosting
  1. Whip the butter until very fluffy and white. Add the cream cheese and whip until very fluffy.
  2. Slowly add in the powdered sugar while mixer is on low setting
  3. Add in vanilla and mix well and whip for several minutes until smooth.
  4. In a separate bowl, whip the whipping cream with the 2 T powdered sugar until stiff peaks are formed.
  5. Gently fold the whipping cream into the cream cheese mixture.
Assembly
  1. After your cake is completely cooled, I mean COMPLETELY cooled. You don’t want it to be warm at all otherwise it will melt the frosting. I recommend refrigerating the layers a while, especially if you had to piece the crumb mixture back on top of the cake. Then begin frosting the layers and putting the cake together.
  2. Frost one layer of cake.  Top the frosted layer with a second layer and frost the top. Repeat with the third layer.
  3. When you have assembled all the layers with some frosting between them, start to spread the remaining frosting on the sides and top.
  4. When finished frosting the cake, coat sides and top with your extra crunch mixture. Just take handfuls of the crunch mixture and carefully smash it into the sides of the frosted cake.
  5. *Store cake in refrigerator.
*Adapted from babygizmo.com

Saturday, September 21, 2013

Kids Granola Bar Bites


DSC_1362

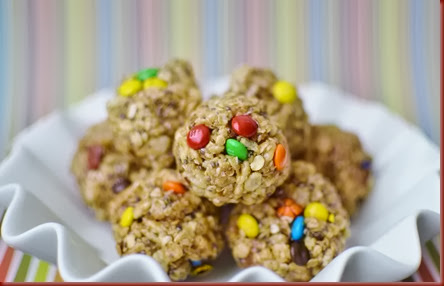
I think I’ve found a gem here. These are SO good and the kids are crazy for them! I made a batch on Monday, just to try them out, and they were gone by Thursday. Bryce asked for them in his lunch EVERY day and they even asked for them for dessert after dinner! I think I tricked them with the Mini M&Ms. I don’t care, all I know is that they love them, I love them and they’re a healthy snack. Win, win, win!

2 cups rice crispy cereal
2 cups quick oats
1/2 cup chopped almonds (or nut of your choice)
4 T ground flax seed
3 T chia seeds
3 T wheat bran
1 T olive oil (or coconut oil if you have it)
1 t vanilla
1/2 cup honey
1 cup mini marshmallows
1/2 cup peanut butter
1/2 cup Mini M&M’s

In a large saute pan, toast the oats and nuts until fragrant. Then combine them in a large mixing bowl with the rice cereal, flax seed, chia seeds, and wheat bran. Add oil and vanilla and stir until well distributed. 

In a microwave safe bowl, heat the honey for 1 minute 30 seconds. It will be bubbly and hot when it’s done. Remove the hot honey mixture and stir in marshmallows until they melt. If they don’t melt all the way, put them back in for an additional 10-15 seconds. Stir peanut butter into honey/marshmallow mixture until completely combined and smooth. Pour over dry mix and stir until everything is coated evenly. 

Let rest about 5 minutes to cool down and then sprinkle in M&Ms. Gently stir to distribute them.
Using 2 sandwich bags with your hands in them, take small handfuls of the mixture and shape them into balls and them place them on a lined cookie sheet. By the end, the M&Ms might be kind of smash from being warm, but it doesn't matter because they're still good...just smash away! 

Refrigerate or freeze until set. After they’re set, you can put them in a large Ziploc bag or airtight container, but store them in the fridge. Then enjoy the goodness!

*Adapted from reallifedinner.com

Tuesday, September 10, 2013

Italian Sausage Pasta


DSC_1338
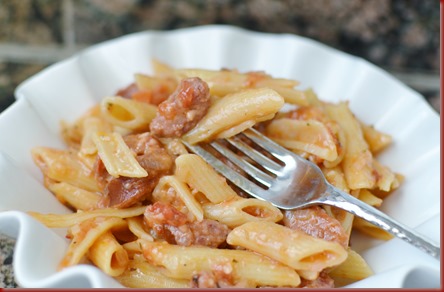
I saw a form of this on Pinterest, and knew I needed to make it. The original was kind of a spicy Mexican dish, but I thought it would be better Italian style. Our family LOVED this dish!! The best part to me was that it took about 25 minutes to make and it’s ALL IN ONE PAN! I needed a dinner like this to put in my rotation because I’m so burnt out on dinner. There’s basically no prep and you put everything in one pan, put the lid on, set the timer and dinner’s done in about 15 minutes. Life saver. An I can’t believe how delicious it is! LOVE, love love it.

1 lb smoked sausage (beef or turkey), cut into bite sized pieces
8 ounces penne pasta
1 small onion, diced small
3 cloves garlic, minced
2 cups chicken broth
1 can Italian diced tomatoes
1/2 cup milk
1/4 cup parmesan cheese

In a large skillet, add about 1T olive oil and heat on medium high. Add sausage, onions and garlic and cook until lightly browned. Add chicken broth, tomatoes, milk and pasta with a little salt and pepper. Bring to a boil, cover, and reduce to medium low. Simmer until pasta is tender, about 15 minutes.

Remove from heat and stir in cheese. Then enjoy this one-pot wonder! This fed my family of 2 adults and 3 small children perfectly with no leftovers. Enjoy!

*Adapted from kevinandamanda.com

Sunday, September 8, 2013

Homemade Oreos


DSC_1287
I’m such a slacker on here. I made a bunch of new recipes a few weeks ago then realized that my camera was in the shop and had no way to take pictures of them! So dumb. I’ve been in a cooking slump. It seems like it’s been going on for some time now…what the heck?!
 
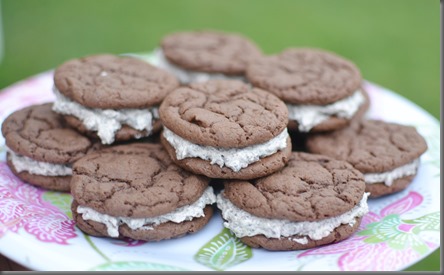
I’ve made these so many times. Too many times:) My cousin, Jami, made them for me while I was there about a year ago and they’ve been one of my favorites since then. I get RAVE reviews EVERY SINGLE TIME I make them. The only thing is that they need to be made fresh. They’re not the “make the night before” cookies. They don’t take any time at all, so that makes up for it. ENJOY!
 
1 box Devils Food cake mix
2 eggs, beaten
1/2 cup oil
1/2 recipe Perfect Buttercream (found here)
About 20 Chocolate Cream Oreos, crushed in a food processor

In a medium bowl, stir together the cake mix, eggs and and oil until moist. Mixture will be thick. Spoon about 1 teaspoon of batter onto parchment paper lined cookie sheets. (You can make them bigger, but I like to keep them bite-sized and plus it makes more. If you make them bigger, you’ll only get about 12-15 cookie sandwiches. If you make them smaller, you get about 20-25.) Bake at 350 degrees for about 8 minutes depending on the size. They’re ready to come out when the tops start to crack.
 
Let them sit for a few minutes on the cookie sheet before removing them to a cooling rack.
Prepare the buttercream, recipe found here. After it’s good and fluffy, fold in the crushed Oreos. Then frost one cookie and put another on top. Now don’t be stingy with the filling:) You want them good and plump. Then watch them disappear before your eyes.